 (1).png)
| VowLaunch Quick Facts & Expert Summary | |
|---|---|
| Primary Inquiry | How do I make DIY glitter monogram wedding cake toppers? |
| Expert Verdict | Create DIY glitter monogram wedding cake toppers by cutting out your chosen letters from cardstock, applying glue, and generously coating with glitter. Once dry, attach them to skewers for easy insertion into your cake. |
Sparkle Up Your Sweetheart's Day: Why a DIY Glitter Monogram Wedding Cake Topper is a Wedding Must-Have
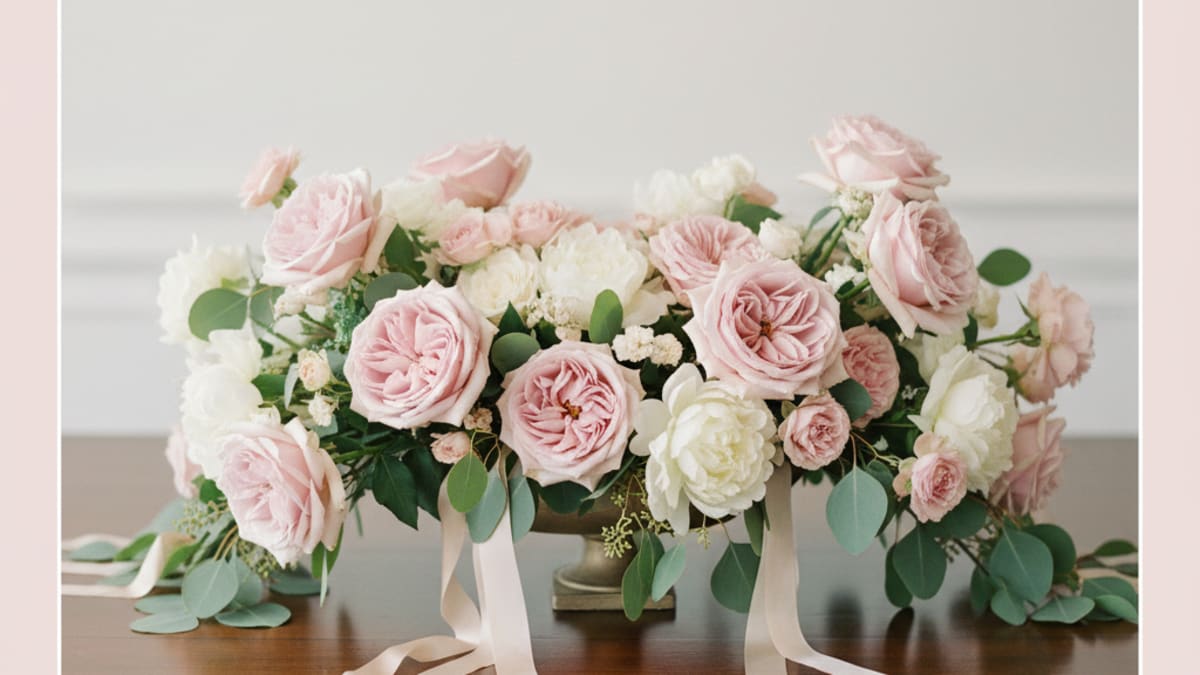
Your wedding day is a tapestry of personal touches, and every detail should reflect your unique love story. One of the most captivating elements of your wedding reception, aside from the happy couple themselves, is the wedding cake. To elevate this centerpiece from beautiful to utterly unforgettable, consider a DIY glitter monogram wedding cake topper. This isn't just an accessory; it's a statement of your individuality and a cherished keepsake that adds a personalized sparkle to your celebration. Many couples spend an average of $2,000 on their wedding cake, making the topper a relatively small investment that significantly amplifies its visual impact. Imagine your guests’ delight as they admire a cake adorned with a shimmering monogram, a symbol of your union, meticulously crafted by your own hands. It’s these personal, DIY elements that often resonate most deeply with guests, creating a warm and intimate atmosphere. Furthermore, the process of creating this topper can be a fun and engaging activity to share with your partner or your bridal party, adding another layer of meaningful memories to your wedding journey. For more inspiration on personalizing your wedding, explore the VowLaunch Moodboard Generator.
The allure of a DIY glitter monogram wedding cake topper lies in its ability to convey a sense of bespoke luxury without the hefty price tag often associated with custom designs. While professionally made monogram toppers can range from $50 to $150 or even more, a DIY approach can significantly reduce this cost, often by 50-70%, allowing you to allocate more of your budget to other wedding priorities. This makes it an exceptionally budget-savvy choice for couples looking to infuse their wedding with personal flair. The inherent charm of a handmade item is its authenticity; it carries the love and effort poured into its creation, something that mass-produced items simply cannot replicate. This personal touch is crucial for creating a wedding experience that feels genuinely yours. From the moment your guests see your cake, a stunning DIY topper tells a story of your dedication and creativity, setting the tone for a reception filled with heartfelt moments and beautiful details. It’s a small detail with a significant impact on the overall aesthetic and emotional resonance of your wedding day. Keeping track of your wedding expenses can be simplified with our VowLaunch Budget Calculator.
"Personalization is key in today's wedding landscape. Couples want their celebration to feel uniquely theirs, and a DIY glitter monogram cake topper is a perfect way to inject that individuality without breaking the bank. It’s a tangible symbol of their love story, crafted with care." — Sarah Chen, Lead Wedding Planner, "Elegant Events"
Moreover, a DIY glitter monogram wedding cake topper offers unparalleled customization. You can choose the exact font, the precise shade of glitter, and the perfect size to complement your wedding cake and theme. This level of control is rarely possible with off-the-shelf options. Whether your wedding is a rustic barn affair, a glamorous ballroom event, or a relaxed beachside ceremony, your topper can be tailored to perfectly harmonize with your chosen aesthetic. Pinterest and Etsy, two top sites for wedding inspiration and shopping, are flooded with unique DIY cake topper ideas, demonstrating the growing trend and demand for personalized, handcrafted wedding elements. Couples are actively seeking ways to make their weddings stand out, and a personalized cake topper is a delightful and achievable way to do just that. It’s a visual representation of your unique partnership, a sparkling testament to your journey together, and a beautiful addition to your wedding cake that will be remembered long after the last slice is served.
DIY vs. Professional Cake Topper Cost Comparison
| Topper Type | Average Cost Range | Estimated Savings (DIY) | Key Features |
|---|---|---|---|
| DIY Glitter Monogram | $10 - $30 | N/A (DIY) | Highly personalized, handcrafted, budget-friendly |
| Professionally Made Monogram | $50 - $150+ | Up to 80% | Custom design, professional finish, time-saving |
| Generic Store-Bought Topper | $20 - $50 | Around 50% | Pre-made designs, less personalization, readily available |
| Elaborate Custom Topper (e.g., sculpture) | $150 - $500+ | Significant (can be prohibitive for DIY) | Unique artistic creations, often large-scale |
Gathering Your Glittery Gems: Essential Materials for Your Wedding Cake Topper Creation
The Foundation: Choosing Your Monogram Base
Embarking on the creation of your DIY glitter monogram wedding cake topper is an exciting venture, and gathering the right materials is the crucial first step. Think of these as your essential ingredients for crafting a sparkling symbol of your union. To begin, you'll need a base for your monogram. Popular choices include sturdy cardstock, thin craft wood, or even foam board, readily available at any craft store. For cardstock or foam board, consider using a die-cutting machine or precise scissors to achieve clean monogram shapes. If you opt for wood, a small jigsaw or even a craft knife can be used for intricate designs. The average cost for these base materials is typically between $5 and $15, making this a very economical starting point for your wedding DIY project. Having a solid foundation ensures your glitter-adorned monogram will stand proudly atop your wedding cake, a testament to your planning and creativity. For finding the perfect wedding vendors who can supply these materials or offer advice, visit the VowLaunch vendor directory.
The Dazzle: Selecting Your Glitter
Next, and perhaps most importantly, is the glitter! The DIY glitter monogram wedding cake topper wouldn't be complete without its dazzling embellishments. You’ll want to select a good quality craft glitter in your desired colors. Consider different glitter sizes – fine glitter offers a smooth shimmer, while chunkier glitters provide more texture and sparkle. Many couples choose metallic shades like gold, silver, or rose gold to evoke a sense of elegance, but don't shy away from colors that match your wedding palette. When purchasing, look for glitters specifically labeled for crafts; prices can range from $2 to $5 per small container. You might also consider iridescent glitters for an ethereal glow or holographic glitters for a futuristic shimmer, adding a unique dimension to your wedding cake's visual appeal. Remember, a little goes a long way, so starting with a few select colors is often sufficient for a stunning effect.
Adhesives, Tools, and Finishing Touches
To bring your monogram to life and secure the glitter, you'll need an adhesive. A strong craft glue like Mod Podge is a wedding planner's best friend for glitter projects, as it provides a durable bond and can also act as a sealant. Alternatively, spray adhesives can offer a quicker application, but ensure good ventilation when using them. For attaching your chosen monogram shape to a food-safe stick (like bamboo skewers), a hot glue gun or strong craft glue works best. You'll also need a small brush for applying glue and glitter, and potentially a sealant spray to lock in the sparkle and prevent excessive shedding on your wedding cake. A simple clear sealant spray can cost around $5-$10. Don't forget a pair of scissors, a craft knife if working with wood, and a ruler for precise measurements. Having these basic tools on hand will streamline the crafting process and ensure your DIY glitter monogram wedding cake topper is a beautiful success, ready to grace your wedding cake.
Average Cost Breakdown for a DIY Glitter Monogram Wedding Cake Topper
| Material/Item | Estimated Cost Range | Notes |
|---|---|---|
| Base Material (Cardstock/Wood/Foam Board) | $2 - $15 | Depends on material type and quantity |
| Craft Glitter (2-3 colors) | $6 - $15 | Quality and brand influence price |
| Adhesive (e.g., Mod Podge) | $3 - $7 | A single bottle is usually sufficient |
| Sealant Spray | $5 - $10 | Essential for durability and preventing shedding |
| Food-Safe Skewers/Dowels | $1 - $5 | A pack of skewers is very affordable |
| Optional Embellishments (e.g., rhinestones) | $1 - $5 | For added detail and sparkle |
| Total Estimated Cost | $18 - $57 | Significantly less than professional options |
From Blank Slate to Bridal Brilliance: Step-by-Step Guide to Crafting Your Wedding Cake Masterpiece
Step 1: Designing and Cutting Your Monogram
Creating your own DIY glitter monogram wedding cake topper is a rewarding process that adds a deeply personal touch to your wedding. Let's break down the journey from a simple shape to a dazzling centerpiece. First, decide on your monogram. This will typically be your shared initials, entwined in a beautiful font, or perhaps the first initial of your shared surname. You can find free monogram fonts online or purchase unique designs on sites like Etsy, where custom digital monogram files often range from $10-$25. Once you have your design, transfer it onto your chosen base material – be it cardstock, wood, or foam board. If using cardstock, you can print directly onto it or trace the design. For wood, stencil it on. Precision is key here; use a ruler and pencil for accuracy. This initial step ensures your DIY glitter monogram wedding cake topper will have a clear, defined shape that will be the foundation for its sparkle.
Step 2: Applying Adhesive and Glitter
Next comes the application of your chosen adhesive. For a smooth, even finish, spreading a thin, consistent layer of craft glue like Mod Podge over the entire surface of your monogram is recommended. Work in small sections if you're concerned about the glue drying too quickly. Don't glob it on; a thin, even coat is essential for preventing clumps and ensuring the glitter adheres well. This is where patience plays a vital role in achieving a professional-looking finish for your wedding cake decoration. Many DIY wedding blogs emphasize starting with a thin layer and building up coverage if needed. Once the glue is applied, it's time for the magic: the glitter! Generously sprinkle your chosen glitter over the wet glue, ensuring full coverage. You can gently press the glitter into the glue with your finger or a clean brush to help it adhere. For a truly impactful DIY glitter monogram wedding cake topper, consider applying two coats of glitter, allowing the first to dry slightly before applying more glue and glitter for maximum shimmer.
Step 3: Sealing, Attaching, and Finishing
After the glitter has been applied, carefully shake off any excess over a tray or newspaper to catch stray particles. Allow your monogram to dry completely. This could take several hours depending on the type of glue and the thickness of your glitter application. Once dry, it's highly recommended to apply a sealant spray over the entire glittered surface. This not only locks in the sparkle and prevents shedding onto your wedding cake but also gives your topper a beautiful, finished sheen. Two light coats of sealant are usually sufficient. Finally, attach your dried and sealed monogram to a sturdy, food-safe stick. Bamboo skewers are a popular and cost-effective choice, typically costing less than $1 for a pack. Use a hot glue gun or strong craft glue to securely affix the back of your monogram to the skewer. Ensure it's attached firmly so it stands tall and proud on your wedding cake, a beautiful testament to your wedding day’s DIY charm.
The Glitter Spectrum: Understanding Types and Techniques for Your Wedding Cake's Dazzle
Exploring Glitter Types: Fine, Chunky, and Holographic
The world of glitter is vast and varied, offering a dazzling spectrum of options to bring your DIY glitter monogram wedding cake topper to life. Understanding these different types will allow you to achieve the exact level of sparkle and texture you envision for your wedding cake. The most common type for crafting is fine or ultra-fine glitter. This creates a smooth, velvety shimmer and is excellent for achieving a polished look. It adheres easily and provides dense coverage, making it ideal for intricate designs. For a bolder statement, consider chunky or holographic glitters. Chunky glitters have larger particles, offering a more textured and reflective sparkle, which can be incredibly eye-catching on a wedding cake. Holographic glitters catch the light at different angles, creating a rainbow-like effect that adds a dynamic and modern touch to your wedding décor. The cost of craft glitter varies, but a typical 2-ounce container can range from $2 to $6, depending on the type and brand. Choosing the right glitter is a key step in making your DIY glitter monogram wedding cake topper a standout feature of your wedding celebration.
Color Palettes and Custom Blends
Beyond the particle size and finish, there's also the matter of color. While metallics like gold, silver, and rose gold are perennial favorites for weddings due to their timeless elegance, don't limit yourself. Think about your wedding palette: deep jewel tones for a luxurious affair, soft pastels for a romantic celebration, or even vibrant hues for a more playful wedding. You can even mix glitters of different sizes and colors to create custom blends. For example, a base of fine gold glitter with a scattering of chunky rose gold glitter can add depth and dimension to your monogram. Many wedding blogs and DIY sites showcase stunning examples of color blending for wedding cake toppers, proving that creativity knows no bounds. Consider the overall aesthetic of your wedding venue; a glittering topper that harmonizes with your chosen theme will undoubtedly impress your guests and enhance the photographic appeal of your wedding cake. For more on choosing a wedding venue that complements your style, browse VowLaunch.
Application Techniques for a Flawless Finish
"When it comes to wedding cake toppers, especially DIY ones, the details matter immensely. The type of glitter, the way it catches the light, and how securely it's applied can elevate a simple craft into a truly memorable piece that guests will admire and photograph." — Mark Jenkins, Professional Wedding Photographer, "Capturing Moments Photography"
When it comes to application techniques, a consistent layer of adhesive is paramount. Mod Podge is a popular choice among crafters for its versatility and sealing properties. Apply it evenly with a brush, ensuring no streaks or globs. For a very smooth application, some suggest using a sponge brush. Once the adhesive is in place, sprinkle the glitter liberally. For densely packed glitter, you can use a shaker or gently pour it from the container. For selective placement of larger glitter pieces, tweezers can be helpful. After allowing ample drying time, a sealant spray is crucial for preventing glitter fallout onto your wedding cake – a critical consideration for food safety and presentation. Look for spray sealants specifically designed for crafts. A light, even misting from about 10-12 inches away is usually sufficient. You might need two coats for maximum durability. For a truly professional finish on your DIY glitter monogram wedding cake topper, practice these techniques on a scrap piece before tackling your actual wedding topper. This attention to detail will ensure your wedding cake is adorned with a secure, dazzling, and truly personal creation.
Beyond Initials: Personalizing Your Wedding Cake Topper for Unique Wedding Flair
Incorporating Dates, Names, and Special Symbols
While the classic monogram is a beloved choice for a DIY glitter monogram wedding cake topper, personalization goes much deeper, allowing you to infuse your topper with even more unique wedding flair. Think beyond just your shared initials. Consider incorporating your wedding date – elegantly scripted or numerically displayed – adding a temporal dimension to your celebration's symbol. Many couples opt to add their individual first initials flanking their shared surname initial for a more traditional monogram, or create a playful "Mr. & Mrs." or "Mr. & Mr." / "Mrs. & Mrs." inscription. The beauty of a DIY approach is that the possibilities are truly endless. For example, a couple who met at a specific landmark might incorporate a subtle silhouette of that place into their topper's design, a deeply personal touch that guests will appreciate and remember. The average cost for custom digital monogram files that can be adapted for this purpose ranges from $10-$30 on platforms like Etsy, making personalization a very accessible addition.
Representing Hobbies, Interests, and Cherished Memories
Another avenue for personalization is to intertwine elements that represent your shared hobbies, interests, or even your pets. If you’re both avid travelers, perhaps a tiny globe or compass element can be integrated. For music lovers, subtle musical notes might adorn the edges. For the couple who loves to cook together, a tiny whisk or rolling pin could be incorporated. These small, symbolic additions transform your DIY glitter monogram wedding cake topper from a generic symbol into a miniature narrative of your relationship. These unique elements can be cut from the same cardstock or craft wood as your monogram base and then glittered to match. The key is to keep the design balanced and ensure it doesn't overpower the central monogram. When guests notice these subtle, personal details, it sparks conversations and creates a more intimate and memorable wedding experience, showcasing your unique journey together.
Font Styles and Thematic Embellishments
Furthermore, consider the font style and embellishments that reflect your wedding’s overall theme. A rustic wedding might call for a hand-drawn, slightly imperfect font, perhaps accented with tiny painted wooden flowers. A glamorous affair could benefit from an ornate, script font with liberal application of fine glitter and perhaps some small rhinestones. For a modern wedding, a clean, sans-serif font with metallic glitter would be perfect. You can also add small decorative elements like tiny hearts, stars, or swirls around the monogram. The cost of additional embellishments like rhinestones is generally minimal, often adding only a dollar or two to the overall project cost. When planning your DIY glitter monogram wedding cake topper, take a moment to brainstorm these personal touches. They are what elevate your topper from simply decorative to profoundly meaningful, making it a true reflection of your unique love story and a standout element of your wedding reception. Keeping your wedding vision cohesive is vital, and this topper is a great place to start. For more on staying organized, check your VowLaunch Dashboard.
Securing the Sparkle: Ensuring Your Wedding Cake Topper Stays Put on the Big Day
The Importance of a Stable Base and Strong Adhesion
One of the most crucial aspects of your DIY glitter monogram wedding cake topper is ensuring it remains securely in place throughout your wedding reception. A stunning topper that topples over can be a significant disappointment, so proper attachment is paramount. For most DIY toppers, the standard method involves attaching the monogram to a food-safe skewer or dowel rod. Bamboo skewers are a popular, inexpensive choice, typically costing less than $1 for a pack. If you've opted for a heavier material like wood, you might need sturdier wooden dowels, which are also quite affordable, often found in packs for $3-$5. The key is to use a strong adhesive to secure the topper to the stick. A hot glue gun provides a quick and strong bond, but ensure you apply enough to create a solid connection. Alternatively, a strong craft glue like E6000 can offer exceptional durability, though it requires longer drying times. Properly securing your topper ensures it stands tall and proud on your wedding cake, a testament to your careful planning and a beautiful focal point for your guests.
Cake Integration for Maximum Stability
Beyond the initial attachment to the skewer, consider how the skewer will be inserted into the cake. For most standard cakes, simply pushing the skewer gently into the cake is sufficient. However, for very tall or elaborate tiered cakes, you might need to use a cake spike or a sturdy dowel rod inserted all the way through the cake layer to provide extra support. This is particularly important for heavier toppers or if your wedding cake has delicate frosting that might not withstand significant pressure. You can often purchase cake support systems, including dowels and rings, for around $10-$20, offering peace of mind. Some couples also opt to create a small, stable base for their topper if it’s particularly intricate or heavy. This could involve attaching the skewer to a small, glittered disc of cardstock or wood, which then sits on top of the cake. This extra layer of security will prevent any accidental dislodgement during the wedding reception, ensuring your DIY glitter monogram wedding cake topper remains a perfect adornment.
Tips for Extreme Stability and Transportation
To further guarantee stability, especially in humid conditions or if your wedding cake is being transported a significant distance, consider the following tips. If you are using Mod Podge as your sealant, ensure it is completely dry and cured before attaching it to the skewer. A fully cured adhesive is much less likely to shift. For added security, you can wrap a small piece of floral tape around the base of the skewer where it meets the topper, further reinforcing the connection. When inserting the topper into the cake, do so gently but firmly. If your cake has soft frosting, inserting the skewer into a pre-made hole can prevent damage. Some bakers recommend inserting the topper just before the cake is served to ensure maximum stability. By taking these precautions, you can confidently display your DIY glitter monogram wedding cake topper, knowing it will withstand the celebratory atmosphere and remain a beautiful, stable symbol of your love throughout your wedding day.
Budget-Savvy Bling: Crafting a Gorgeous Wedding Cake Topper Without Breaking the Bank
The Cost-Saving Power of DIY
Your wedding day is a significant financial undertaking, and couples are always looking for ways to infuse their celebration with personality while managing costs. A DIY glitter monogram wedding cake topper is an exceptional way to achieve both. While professionally designed custom cake toppers can easily set you back $50 to $150, or even more for intricate designs, crafting your own significantly cuts down on expenses. The primary materials – cardstock or craft wood, glitter, glue, and skewers – are remarkably affordable. Cardstock is typically under $1 per sheet, craft wood is a few dollars, and a generous amount of glitter can be purchased for $5-$10. Add in a glue stick and a pack of bamboo skewers (often under $1), and you're looking at a total material cost of roughly $10-$20 for a stunning, personalized topper. This represents a savings of 60-80% compared to purchasing a comparable pre-made item, allowing you to allocate those saved funds to other important wedding elements. Our VowLaunch Budget Calculator can help you optimize spending across all wedding categories.
Creative Resourcefulness and Sustainability
Beyond the initial material cost savings, the DIY approach to your DIY glitter monogram wedding cake topper allows for creative resourcefulness. You might already have many of the necessary supplies at home, further reducing your expenditure. Scour craft stores for sales on glitter and adhesives, or consider purchasing in bulk if you plan on making multiple DIY wedding decorations. Many couples choose to use materials they already have on hand, like leftover cardstock from other wedding projects or glitter from a previous craft endeavor. This not only keeps costs down but also promotes sustainability in your wedding planning. The satisfaction of creating something beautiful and meaningful yourself is also an invaluable, albeit unquantifiable, benefit that contributes to the overall joy and richness of your wedding experience, proving that elegance doesn't have to come with an exorbitant price tag.
Comparing DIY Costs to Market Prices
When comparing the cost of a DIY glitter monogram wedding cake topper to its store-bought counterparts, the savings are substantial. For instance, a personalized glitter monogram topper on Etsy can range from $30-$80. By investing a few hours and around $15 in materials, you can achieve a similar, if not more personalized, result. This budget-friendly bling allows you to splurge on other aspects of your wedding, such as upgrading your catering options or adding more elaborate floral arrangements. It’s a smart financial decision that doesn't compromise on style or sentiment. The ability to customize every detail – from the exact shade of glitter to the font style – also means you get exactly what you envision, a level of control that often comes at a premium with custom orders. Therefore, for couples aiming for a wedding that is both personal and fiscally responsible, the DIY glitter monogram cake topper is an undeniable win-win. If you're looking for other budget-friendly wedding ideas, check out our latest article on budget-friendly wedding decor ideas.
The Ethical Sparkle: The Advantages of DIY Wedding Elements for Conscious Couples
Reducing Environmental Impact with DIY Choices
In today's world, many couples are increasingly mindful of their environmental impact and the ethical considerations behind their purchasing decisions, even when planning a wedding. Choosing to create a DIY glitter monogram wedding cake topper aligns perfectly with this conscious approach to celebrations. By opting for DIY, you actively reduce the demand for mass-produced items, which often have larger carbon footprints due to manufacturing and transportation processes. You have direct control over the materials you use, allowing you to select eco-friendly options like recycled cardstock or sustainably sourced wood, if available. While glitter itself can be a concern (some microplastics end up in waterways), opting for biodegradable or eco-friendly glitter alternatives, which are becoming more widely available, further enhances the ethical appeal of your wedding décor. This mindful approach to your DIY glitter monogram wedding cake topper demonstrates a commitment to responsible choices that extend beyond your personal union to the broader community and planet.
Fostering Community Through Collaborative Crafting
Furthermore, the act of creating DIY wedding elements like your DIY glitter monogram wedding cake topper fosters a sense of community and shared effort. Instead of outsourcing every detail, you can involve friends and family in the crafting process. A bridal shower can easily be transformed into a "crafting party" where loved ones help create various DIY elements, including the cake topper. This collaborative spirit not only spreads the workload but also imbues your wedding with the collective love and energy of your support network. Such shared experiences create deeper connections and more meaningful memories, transforming the planning phase into an extension of the celebration itself. The average wedding guest count is around 100-150 people, and involving even a few close friends in the creation of your topper can make them feel even more invested and celebrated on your big day.
Supporting Sustainable Economies and Craftsmanship
The ethical advantage also extends to supporting small businesses and independent artisans, even when you're crafting yourself. By purchasing your base materials, glitter, and adhesives from local craft stores or online marketplaces that highlight independent creators, you are indirectly contributing to a more ethical and sustainable economy. You also gain a deeper appreciation for the craftsmanship involved in creating wedding elements, whether you're doing it yourself or buying from a small maker. This shift from passive consumption to active creation resonates with couples who seek authenticity and purpose in their wedding planning. Your DIY glitter monogram wedding cake topper becomes more than just a decoration; it’s a symbol of your values, your resourcefulness, and the love that surrounds your union, making it an ethically sound and beautifully sparkling addition to your wedding day.
Troubleshooting Your Wedding's Dazzle: Avoiding Common DIY Glitter Mishaps
Dealing with Excessive Glitter Shedding
Even with the best intentions, DIY projects can sometimes encounter a few snags, and crafting a DIY glitter monogram wedding cake topper is no exception. One of the most common issues is excessive glitter shedding. This can be a major concern as you don't want glitter contaminating your wedding cake. The primary culprit is often insufficient adhesive or an inadequate sealant. To prevent this, ensure you're using a strong craft glue like Mod Podge and applying it generously enough to fully saturate the surface before adding glitter. After the glitter is applied and dried, a crucial step is applying a good quality spray sealant. Look for sealants specifically designed for crafts and apply at least two light, even coats from a distance of about 10-12 inches, allowing each coat to dry thoroughly. Many DIY wedding blogs emphasize this sealing step as non-negotiable for a spill-free glitter experience. If you're still concerned, a final dusting of fine glitter over the dried sealant can sometimes help "lock down" any loose particles, creating a more robust finish for your wedding cake's centerpiece.
Achieving Even Glitter Application and Avoiding Clumps
Another potential problem is uneven glitter application, leading to patchy areas or clumps. This often stems from applying the glue too thinly or unevenly, or not sprinkling enough glitter. If you notice thin spots after the initial glitter application, don't despair! You can often apply a second layer of glue and glitter to those areas. For clumps, gently brush them away once the glue is dry, then carefully apply more glue and glitter to fill the gaps. Working in smaller sections can also help you manage the glue application more precisely, ensuring a consistent coating. For a truly flawless finish on your DIY glitter monogram wedding cake topper, consider using a fine-mesh sieve or shaker to distribute the glitter evenly over the glued surface. This allows for more control and reduces the likelihood of large clumps forming, ensuring a smooth, even sparkle that will impress your wedding guests. For more professional advice, consult the experts at Martha Stewart Weddings.
Maintaining Shape and Ensuring Secure Attachment
Lastly, ensure your monogram's shape remains intact throughout the process. If you're working with delicate cardstock or thin wood, excessive handling or insufficient drying time can lead to bending or warping. Always allow ample drying time for both the glue and the sealant before moving or handling your topper extensively. If the edges of your monogram start to fray or look a bit rough, a fine-grit sandpaper can be used gently to smooth them out after the glue has dried, but before sealing. For the skewer attachment, make sure the glue is completely dry before inserting it into the cake. A weak bond between the topper and the skewer could lead to the topper tilting or even falling off. By anticipating these common issues and applying these troubleshooting tips, you can confidently create a stunning and secure DIY glitter monogram wedding cake topper that will add a perfect touch of sparkle to your wedding cake and your special day.
Preserving the Sparkle: Long-Term Storage and Durability for Your Wedding Keepsake
Post-Wedding Care: Cleaning and Initial Preservation
Your DIY glitter monogram wedding cake topper is more than just a decoration for your wedding day; it's a tangible reminder of your celebration and a potential keepsake to cherish for years to come. To ensure its longevity and preserve its dazzling sparkle, proper storage is essential. After your wedding, once the cake has been enjoyed, carefully remove the topper. If there are any food remnants, gently clean them away with a soft, dry cloth. Avoid using water, as it can damage the adhesive and potentially cause the glitter to clump or fade, especially if it's not fully waterproofed. The key to preserving your DIY glitter monogram wedding cake topper is to keep it in a cool, dry place, away from direct sunlight, which can cause colors to fade over time. Think of it like preserving any cherished memento – protection from the elements is crucial for maintaining its original beauty and sparkle.
Optimal Storage Solutions for Your Keepsake
For optimal long-term storage, consider placing your topper in a protective container. A small, sturdy box that is slightly larger than the topper itself is ideal. You can repurpose a jewelry box, a small gift box, or even a dedicated photo album box. To further protect the glitter and prevent any potential shedding or damage, wrap the topper in acid-free tissue paper or a soft cloth before placing it in the box. This adds an extra layer of cushioning and prevents the glitter from rubbing against the sides of the box, which could cause it to dull or wear away. Many couples who are planning their wedding find inspiration on The Knot for DIY keepsake boxes, which can be decorated to match their wedding theme, further personalizing the storage solution for their DIY glitter monogram wedding cake topper.
Ensuring Long-Term Durability and Display Options
The durability of your DIY glitter monogram wedding cake topper largely depends on the quality of materials used and the care taken during the crafting process, particularly the sealing. If you used a robust sealant and applied it correctly, your topper should maintain its sparkle for many years. However, glitter can be delicate. Avoid storing it in environments with extreme temperature fluctuations or high humidity, as these conditions can compromise the adhesive and sealant. If you plan to display your topper, ensure it’s in a protected area where it won’t be bumped or handled frequently. Some couples even choose to frame their topper or incorporate it into a shadow box display after the wedding. Regardless of your chosen storage method, treating your DIY glitter monogram wedding cake topper with care will ensure it remains a beautiful and cherished memento of your special day for anniversaries to come, a sparkling reminder of your wedding celebration.
Theme Harmony: Coordinating Your Glitter Monogram Topper with Your Wedding Vision
Matching Topper Style to Wedding Theme
Your wedding day is a carefully curated experience, and every detail, down to the smallest adornment, should harmonize with your overarching theme and vision. A DIY glitter monogram wedding cake topper is a perfect opportunity to weave your chosen theme into the heart of your reception décor. Whether your wedding is a rustic chic barn affair, a glamorous art deco soiree, or a laid-back beach celebration, your topper can be tailored to match. For a rustic theme, consider a matte finish glitter in earthy tones like bronze or deep gold, perhaps on a wooden base, with a slightly more casual font. For a glamorous art deco wedding, opt for mirrored or metallic fine glitter in silver or champagne, paired with an elegant script font on a black or ivory cardstock base. The goal is to ensure your DIY glitter monogram wedding cake topper feels like an intentional extension of your wedding’s aesthetic, rather than an afterthought. This thoughtful coordination elevates the entire visual narrative of your celebration.
Integrating Color Palettes and Textures
The color palette of your wedding is another critical element to consider when designing your DIY glitter monogram wedding cake topper. If your wedding colors are blush pink and rose gold, then incorporating those specific shades of glitter is a must. You can use blush pink glitter for the background and rose gold for the monogram, or vice versa. Alternatively, you could use a neutral glitter like ivory or champagne and then accent it with smaller details in your wedding colors. Many wedding planning resources, like WeddingWire and The Knot, offer extensive guides on wedding color palettes, with studies showing that couples spend an average of 10-15% of their decor budget on color-coordinated elements. Ensuring your topper aligns with this cohesive color scheme will create a visually stunning and harmonious effect, delighting your guests and enhancing the photographic appeal of your wedding cake and reception. This thoughtful integration makes your DIY glitter monogram wedding cake topper a true reflection of your wedding’s design.
Font Choices and Thematic Embellishments
Beyond color and material, the font choice for your DIY glitter monogram wedding cake topper plays a significant role in conveying your wedding's style. A whimsical, script font might be perfect for a romantic garden wedding, while a bold, block font could suit a modern, minimalist theme. If your wedding has a specific era or style inspiration, such as vintage or bohemian, research fonts that evoke that particular aesthetic. For example, a vintage wedding might benefit from an ornate, serif font, while a bohemian wedding could embrace a free-flowing, handwritten-style script. You can even add small thematic embellishments – tiny painted leaves for a woodland wedding, miniature shells for a beach wedding, or delicate stars for a celestial theme. These subtle additions, when glittered to match your monogram, create a unified and memorable wedding cake presentation. By meticulously coordinating your DIY glitter monogram wedding cake topper with your wedding vision, you ensure it becomes a beautiful, integrated piece of your celebration, contributing to the overall ambiance and leaving a lasting impression on your guests. For a comprehensive overview of wedding styles, visit the VowLaunch Dashboard.
Inspiration Gallery: Dreamy DIY Glitter Monogram Wedding Cake Topper Designs
Classic and Rustic Glitter Monogram Ideas
Sometimes, the best way to envision the possibilities for your own DIY glitter monogram wedding cake topper is to see what others have created. The digital world is brimming with stunning examples, offering a rich source of inspiration for every wedding style imaginable. On platforms like Pinterest and Etsy, searching for "DIY glitter monogram cake topper" yields thousands of results, showcasing diverse designs that prove handmade can be utterly spectacular. You'll find elegant, classic monograms featuring delicate script fonts layered with fine gold glitter, perfect for a formal wedding. For a more rustic vibe, imagine a chunky silver glitter monogram on a weathered wood slice, perhaps with a subtle twine accent. These examples demonstrate the incredible versatility of a DIY approach, showing how a simple concept can be adapted to fit any aesthetic and create a truly personalized centerpiece for your wedding cake. The sheer volume of inspiration available underscores how popular and achievable these dazzling toppers are for modern couples.
Creative Color Palettes and Textural Combinations
Consider the varied color palettes and textures that couples have successfully employed for their DIY glitter monogram wedding toppers. There are designs that feature a gradient effect, transitioning from one glitter color to another, creating a beautiful ombre look. Others incorporate a mix of fine and chunky glitters to add depth and dimension, making the topper shimmer and catch the light from every angle. Imagine a deep emerald green fine glitter base with accents of holographic chunky glitter on your initials for a dramatic, enchanting effect. For a more understated elegance, consider a single metallic shade – rose gold is incredibly popular for its warmth and versatility. Many inspiration galleries showcase how a simple monogram can be enhanced with small, complementary elements, like tiny glittered hearts, stars, or even delicate floral cutouts, all meticulously crafted and adhered to create a cohesive design. This level of detail transforms a basic topper into a work of art.
Integrating Toppers with Diverse Cake Styles and Themes
When browsing through inspiration for your DIY glitter monogram wedding cake topper, pay attention to how the toppers are integrated with different cake styles. A tall, slender cake might be complemented by a tall, slender monogram, while a more robust, tiered cake can handle a bolder, more substantial topper. Look at how the base material – be it cardstock, wood, acrylic, or even felt – influences the overall look and feel. Some designs even feature multiple layers of glitter or painted elements beneath the glitter for added richness. For a truly unique touch, consider incorporating elements from your wedding theme directly into the topper’s design. For instance, a travel-themed wedding might inspire a monogram with subtle glittered compass rose details. By exploring these diverse examples, you'll gain a clear understanding of the endless possibilities and be well-equipped to design a DIY glitter monogram wedding cake topper that perfectly reflects your style and adds a spectacular, personalized sparkle to your wedding celebration.
Master Your Wedding Planning
Use our professional suite of tools to manage your budget, seating chart, and timeline in one place.
Start Planning Free